Subscribe
How to Put WordPress Into Maintenance Mode
When it comes to maintaining a WordPress website, one of the most important steps is putting it into maintenance mode. This ensures that visitors to the site won’t be able to access any of the pages or posts while you work on different things. But for many website owners, putting a site into maintenance mode can be confusing and time-consuming.
One of the most significant pain points of maintenance mode is that it can disrupt the user experience. If visitors to your site are met with a 404 error message or a blank page, they may assume the site is down or no longer in operation. This can lead to a loss of trust and credibility, as well as lost sales and revenue.
Fortunately, there are several easy ways to put your WordPress website into maintenance mode without disrupting the user experience. Whether you use a plugin, a custom maintenance page, or a .htaccess file, these methods allow you to quickly and easily change your site without causing any confusion or frustration for your visitors.
In this article, we’ll walk you through the most popular methods for putting a WordPress website into maintenance mode.
Content Outline
- Scenarios where maintenance mode is necessary
- Using the Maintenance mode plugin to put WordPress into Maintenance Mode
- Using .htaccess to activate maintenance mode in WordPress
- Use the Custom function to activate maintenance mode on WordPress
- Wrapping Up
Scenarios where maintenance mode is necessary
There are several scenarios where putting a WordPress website into maintenance mode is necessary. Some of these include:
- Updating the WordPress core, theme, or plugins: This can include both minor and major updates. Putting the site into maintenance mode ensures that visitors won’t be able to access the site while the updates are being applied, preventing any conflicts or errors from occurring.
- Making changes to the site’s design or layout: Whether you’re revamping the site’s overall look and feel or making small changes to specific pages, entering maintenance mode is a good idea to prevent visitors from seeing the site in a broken or unfinished state.
- Fixing security vulnerabilities: If your site has been hacked or is at risk of being hacked, maintenance mode can help protect it from further damage while you work on fixing the issue.
- Site migration: When you are migrating your website from one server to another, to another domain or another platform, putting the website into maintenance mode prevents visitors from accessing the site while the migration is in progress, avoiding any potential issues.
- Running website optimization: This can include optimizing images, cleaning up the database, or minifying CSS and JavaScript files. Maintenance mode can prevent visitors from accessing the site while these optimizations are being performed, ensuring that the site runs smoothly and quickly once they are done.
Using the Maintenance mode plugin to put WordPress into Maintenance Mode
Setting up maintenance mode using the WP Maintenance Mode plugin is simple. Here are the steps you’ll need to follow:
Step 1: Install and activate the WP Maintenance Mode plugin from the WordPress repository, or upload the plugin files to your server.
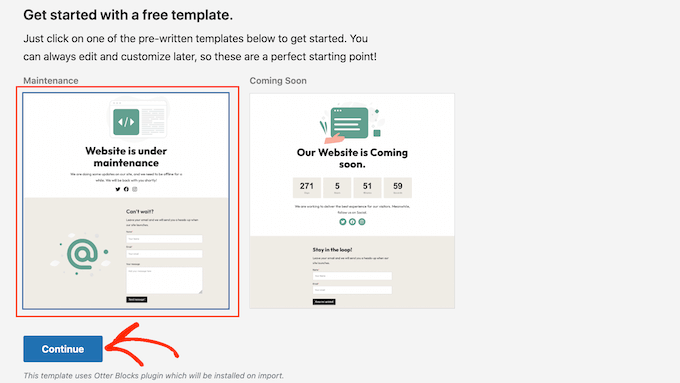
Step 2: Upon installation, you’ll be given the option to select the template you want, either Maintenance or Coming Soon. Click on the Website is under maintenance template to create your maintenance mode, and then select the Continue button.
Step 3: You will see an option to join an email list. You have the option of not joining the email list by clicking – I’ll skip for now, thanks.

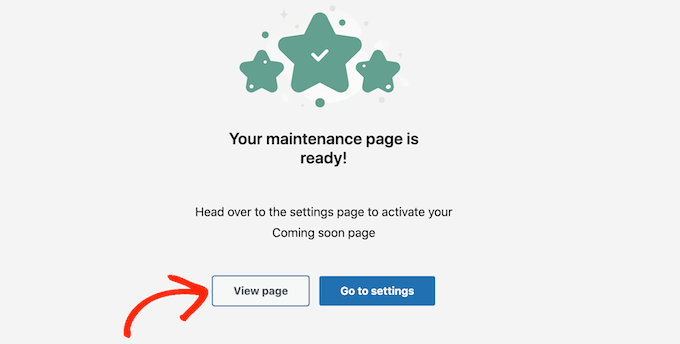
Step 4: A simple page based on the template will appear. You can press the View Page button, which opens the template in the standard post editor.
Note: If you’re unsatisfied with the default template, go to Settings » WP Maintenance Mode, and then click on the Design tab. From there, you’ll be able to browse through other options and find something that works better for you.
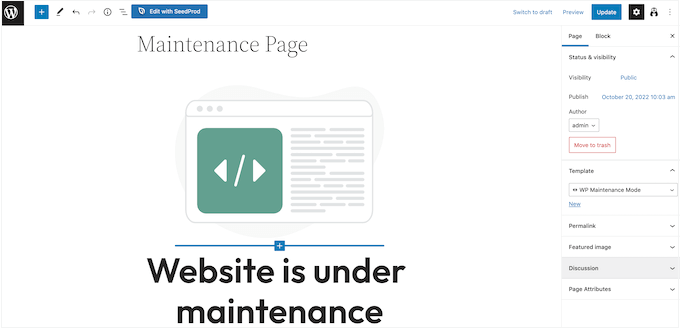
Step 5: Make the exact changes you want to the template. You can add text, images, and other elements to the maintenance mode template.
Step 6: The template has social media placeholders. You can click on the icon and add the URL of your social media accounts.
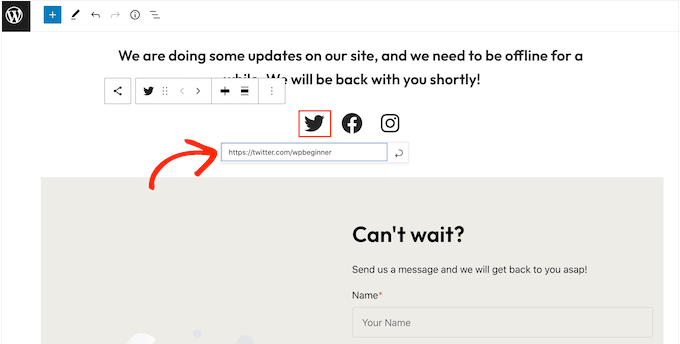
Step 7: Click Update when you are done making changes.
Now that the design portion is complete, it’s time to set up your maintenance mode settings. Go to Settings » WP Maintenance Mode.
Click on the General tab.
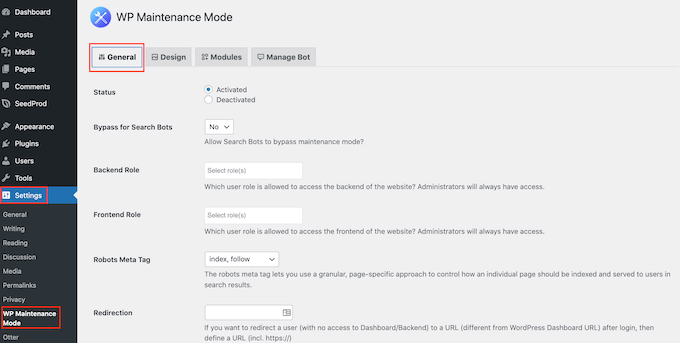
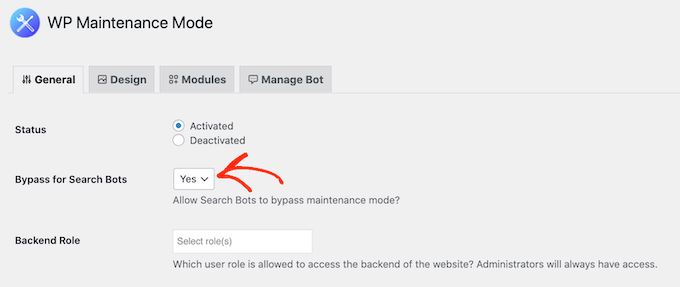
By default, search engine bots cannot see your site while it is in maintenance mode, which can hurt your WordPress SEO. If you’re planning maintenance for an extended period, this could hurt your site’s ranking in the search engine results pages.
We recommend opening the Bypass for Search Bots dropdown and choosing Yes. This way, any search engine crawlers will bypass your maintenance page.
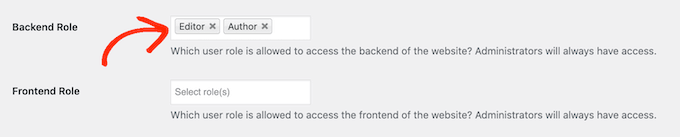
As the site administrator, you have full access to your WordPress site and database even when it’s in maintenance mode. However, you can give other user roles access to certain areas of the site while it’s down for maintenance.
Selecting a user role from the list in the Backend dropdown menu allows people access to the WordPress dashboard. Use the Frontend option to provide users access to your website’s public-facing pages.
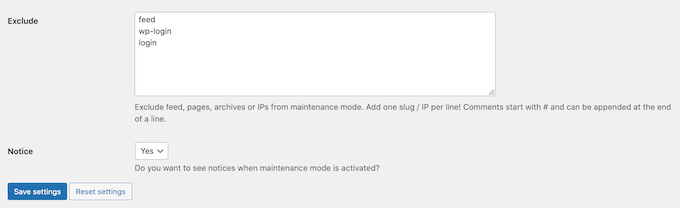
You can always keep certain pages accessible to visitors, even when the rest of your site is down for maintenance. For example, if you want your booking form to be available, you can exclude it from maintenance mode.
You can exclude a page from maintenance mode by adding its slug to the Exclude box.
Select the Modules option if you use Google Analytics to monitor traffic to your WordPress website. Then, you may choose Yes from the dropdown menu next to Use Google Analytics.
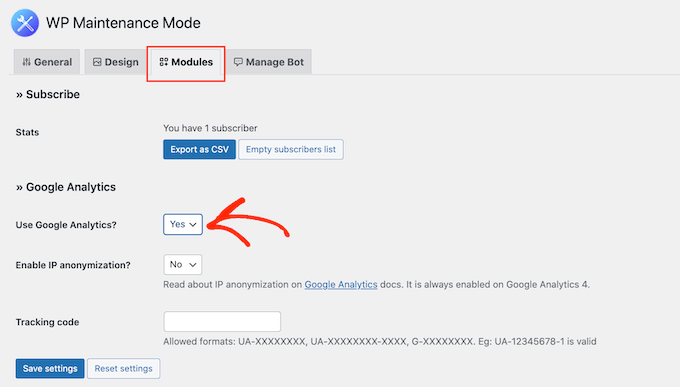
At that point, provide your tracking ID in the Tracking Code section.
Many more settings are interesting to look at, and most of them are apparent. Once maintenance mode is configured to your satisfaction, click the Save settings button to save your changes.
You can activate maintenance mode anytime by selecting the General tab and clicking on the Activated radio button.
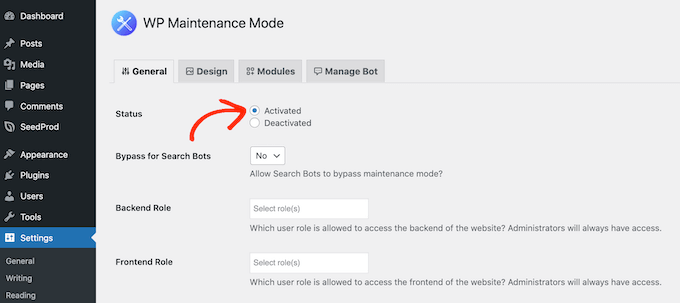
Then, after you scroll down to the bottom of the page, select Save settings. You will now see the maintenance page if you visit your site in an incognito browser tab.
When you are ready to exit maintenance mode, return to the General tab and choose Deactivated. Once again, your website will be accessible to anyone who views it by simply clicking the Save changes button.
Using .htaccess to activate maintenance mode in WordPress
Using .htaccess to activate maintenance mode is more technical than using a plugin, but it can be useful if you don’t want to install additional software on your server.
Here are the steps you’ll need to follow:
Step 1: Find the .htaccess file in the directory of your website. Go to the File Manager after logging into cPanel. Open the public html directory after that.
Step 2: Create a new file named maintenance.html and upload it to the root directory of your website. This file will be displayed to visitors while your site is in maintenance mode.
Step 3: In the .htaccess file, add the following code:
RewriteEngine On

RewriteBase /

RewriteCond %{REQUEST_URI} !^/maintenance\.html$

RewriteRule ^(.*)$ https://example.com/maintenance.html [R=307,L]
This code tells the server to redirect all requests to the maintenance.html page, except those made by your IP address.
Use the Custom function to activate maintenance mode on WordPress
Note: The functions.php file must be modified to use this technique. Before continuing, we firmly advise creating a backup of your WordPress website.
Here’s how you can use the custom function to activate maintenance mode:
Step 1: Go to Appearance -> Theme Editor in your WordPress admin dashboard. You’ll find a list of theme files located on the right side. Selecting Theme Functions will enable you to edit the code in the editor and access the functions.php file.
Step 2: Add the following code to the end of your file:
// Activate WordPress Maintenance Mode

function wp_maintenance_mode() {

if (!current_user_can(‘edit_themes’) || !is_user_logged_in()) {

wp_die(‘<h1>Under Maintenance</h1><br />Website under planned maintenance. Please check back later.’);

}

}

add_action(‘get_header’, ‘wp_maintenance_mode’);
This will make the default WordPress maintenance screen active. You can modify the code if you want to change the HTML message appearing on the screen.
Find the wp_die function on the fourth line of code and edit the HTML text in the parentheses to any message you want. For example, you could change the message to The website is currently down for scheduled maintenance. Please check back later.
Step 4: Click on Update File.
Step 5: Once you’re finished making changes to the functions.php file, remember to remove the code so your website is live again.
Wrapping Up
In conclusion, putting a WordPress website into maintenance mode is crucial in maintaining and updating your site. Whether you’re applying updates, making changes to the design or layout, or fixing security vulnerabilities, maintenance mode ensures that your visitors won’t be able to access the site while you work.
There are several methods for putting a WordPress website into maintenance mode, each with its own benefits and drawbacks. Using a plugin such as WP Maintenance Mode is an easy and user-friendly option while using .htaccess or a custom function is more technical and requires a certain understanding of web development and server configurations.
And remember, you can hire WordPress developers to implement the seamless workarounds on your website and safely put the maintenance mode on your website.
Regardless of your chosen method, it’s important to remember that maintenance mode is an essential part of website management. By putting your site into maintenance mode properly, you can ensure that your visitors have a positive experience and that your site stays secure and functional.